Friday, October 21, 2011

Mary De, the final chapter

OK, it's time to finish Mary De. In my last post we finished by drawing in the armhole curve and pulling the gathering thread to the inside of this drawn in line. Now stitch right over the drawn line, trying not to stretch or distort the smocking. For safety, stitch it twice. Be very careful NOT to stitch over your gathering thread as you will need it for final adjustment. Next cut out the armhole close to the stitching. In the photo below, the yellow thread is my gathering thread.

Now it is time to apply the piping to the yoke, paying attention to the seam allowance, which is 1/2 inch where the smocking is attached to the yoke, and where the back skirts are attached to the back yokes. All other seam allowances are 1/4 inch. After the piping is stitched to the yoke press it with the seam allowance toward the yoke. Now place the smocked piece under the yoke to make the final adjustment of the smocked piece to the exact measurement of the yoke. NOW tie off the gathering thread to this measurement and adjust pleats evenly.  Then apply "Wonder Tape" to the seam allowance of the yoke, trying to place it out of the way of where you will be stitching.

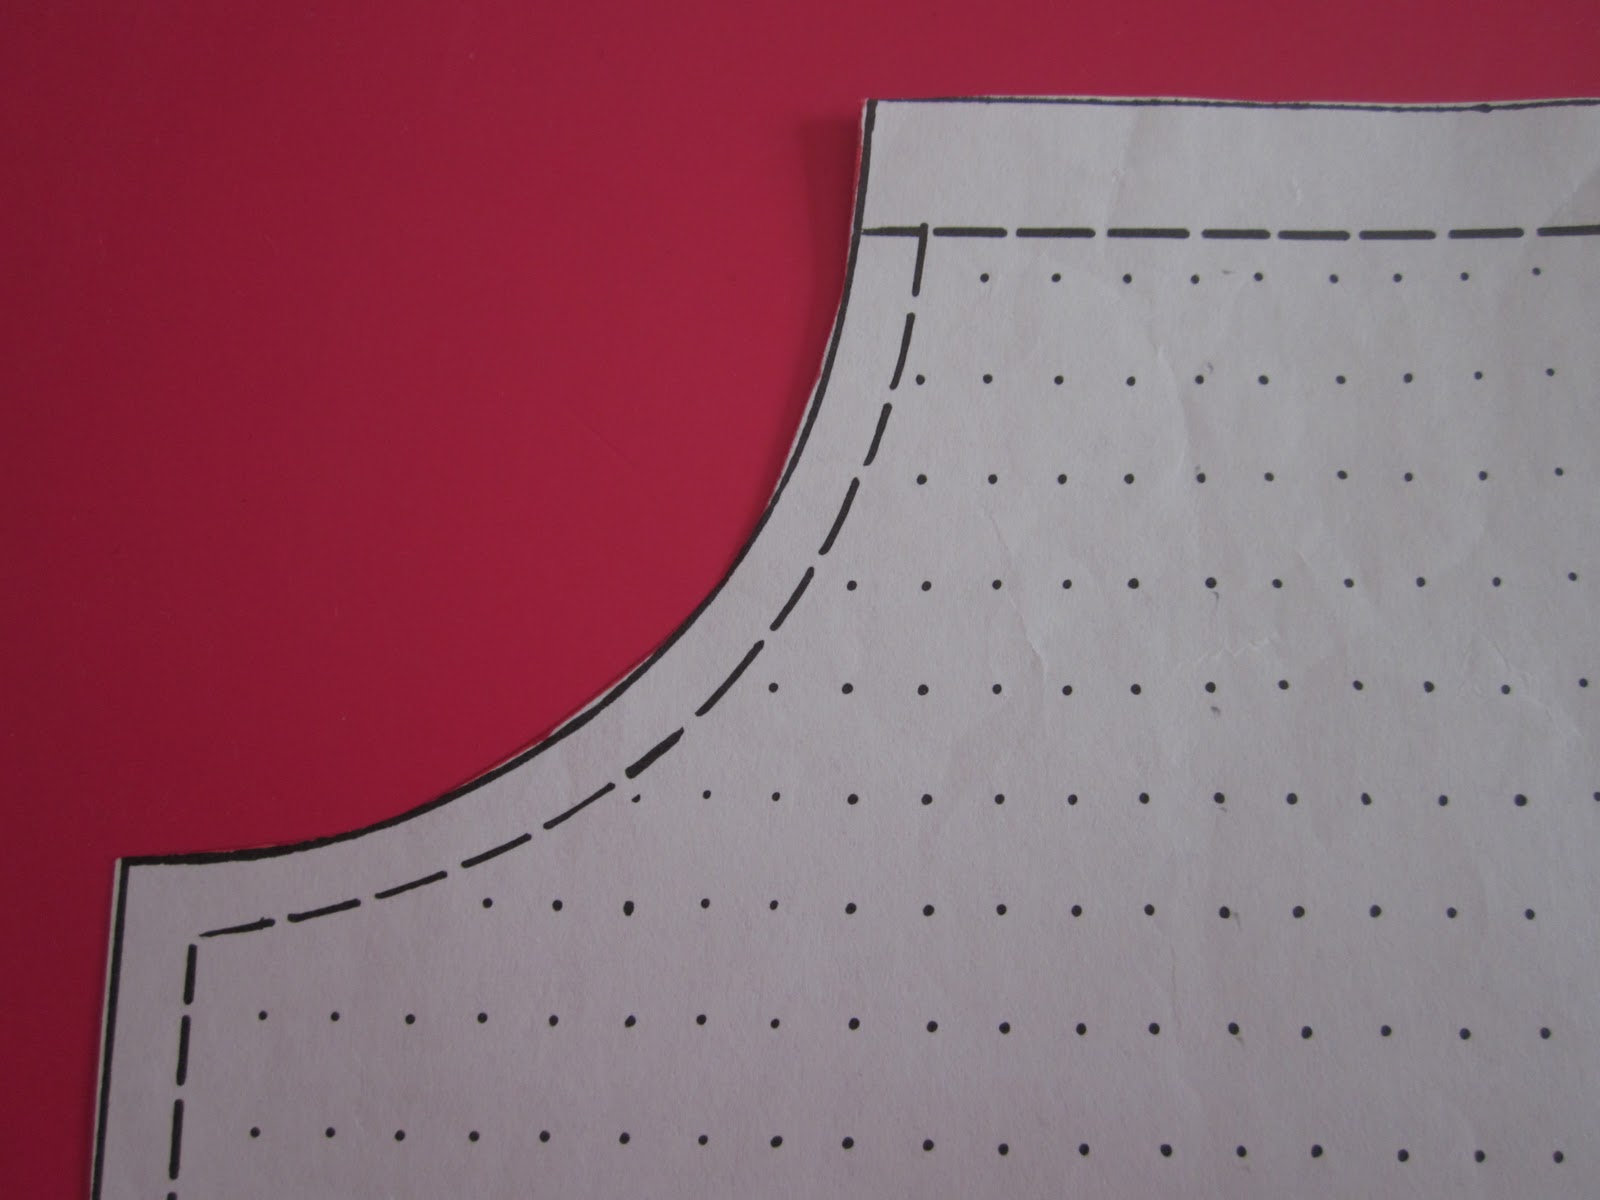
Next place the yoke over the smocked skirt, very carefully placing it exactly where you want it. You must be mindful of the 1/2 inch seam allowance, but you will be able to place it very accurately. Press down to stick it to the skirt. Next flip the yoke down and stitch with the yoke side up. If you have a three groove foot this step is easy because your piping can ride in one of the grooves and you will be able to stitch right up close to your piping and keep the stitching consistent. Wonder Tape will dissolve with washing, but if you want you can remove it now, as long as you have not stitched over it. NOW you can remove the gathering thread. Do you see why this gathering row is so important?  Grade your seam allowance.
 The next steps of the dress are pretty straight forward. The only other tricky part involves a typical Children's Corner "Stitch and Turn" technique that is puzzling, but it works. Smocking patterns of yesteryear were very scant on instructions, and most have not been corrected or updated. I think the newer patterns have more detailed instruction. Anyhoo, once you have stitched your neck and back yoke lie your dress out like this.
Now you need to stitch the armholes. Bring right front to right back, right sides together, encasing the entire dress between. It will look like this.

Double stitch the armhole, trim and clip the curve. Next pull the backs through to the front. NOW. at this point I guarantee you will think you have done something wrong because the dress is still wrong side out! But alas, there is one more step! Pull the one back through to the front and VOILA! You have done it! Repeat for the second side. I really tried to take pictures of this turning business, but they just looked like a bunch of fabric. One other pattern detail. The button holes on the newer patterns are vertical; they should be horizontal. Button holes are always in the direction of the stress that will be placed on the garment, with the exception of a shirt or dress front with a placket. Here is my dress, minus a hem. I really need to try this dress on my girl before hemming. As usual I will also do a grow tuck.
As I have said, I have made dozens of Mary De. If you have not and you still find it daunting, even after these (hopefully) helpful instructions, there is another pattern alternative. Bonnie Blue has this pattern with several variations, one of which is smocked. The back is just like Mary De. I have not made it yet, but it is certainly worth a try. The instructions may be more detailed.
 This is the smocking plate I used, or at least a portion of it.

It is a Grace Knott plate. If you have seen her plates, you may find the colors off-putting and the designs dense and with too many rows. However, they are a fabulous resource. Change up the colors and use only selected rows. The stitch combinations are really quite beautiful. Check out the Grace Knott website. The company is run by Grace's grandson, with Judith Marquis as their designer. Lots to offer on the website including a plate of the month! Also check out Grace Knott's story featured in Creative Needle July/August 1997. She came to Canada in 1930 as a war bride. Quite a story about her, her family and the business.

Now on to Christmas projects! Vivi will wear a bishop dress that was Adelaide's. A new dress for the big girl. Just a basic yoke in a fine red and white stripe. I have made Vivi two dresses just for her this year, but since the use of Christmas dresses is a bit limited, she gets a gently used dress this year. Here is the bishop dress.

OHHHHH! I just came across this photo of Vivi in her "going home" outfit! Grandchildren really do make growing old worthwhile! I promise to post pictures of Sammy soon.

Sunday, October 16, 2011

Mary De Revisited

Samuel Robert Braithwaite arrived on October 9th, weighing 8 lbs 10 oz.
Meredith is starting to feel better, and everyone is quite smitten with little Sammy.

  Adelaide thinks he is very pretty and can't stop kissing him. Vivi just wants to get the magnets off Auntie's refrigerator. He looked beautiful in his going home outfit....pictures of that later.

Let's get back to Mary De. Today I want to tell you about some issues with cutting and pleating. Here is a picture of the curve on skirt front pattern. In the next picture I have matched the skirt piece to the front yoke lining piece.

You can see that they line up perfectly. The directions say to cut out the front skirt and pleat. First of all if you cut it out with the curve cut out,  it would be very difficult to pleat. Secondly if you then pull up the pleats to smock, the piece would then have a much smaller armhole than the front yoke. SO....cut out or tear your front skirt without cutting or marking the armhole curve, and pleat the desired number of rows. I usually pleat two more rows than I am going to smock; a gathering row at the top and an extra row at the bottom because it is easier to smock the last row if there is a pleated row below it.

Next take the front yoke lining piece, tape it to a window and make a full paper copy. You will end up with this.


Open up your pleated piece to the full width of this piece and tie of your pleating threads. DO NOT TIE OFF YOUR GATHERING ROW AT THE TOP!!! Now you are ready to smock.

When your smocking is complete, remove your pleating threads, BUT NOT THE GATHERING ROW AT THE TOP. You will need to steam your smocked piece to fit, and mark your armhole curves. (No matter how careful you are about your tension, it usually ends up smaller than what your started with. This is not a problem as smocking is quite elastic.)I usually do this right on my ironing board. Once again use the front yoke lining piece. Mine, pictured below is a little wider because I left larger seam allowances to be trimmed later. Pin straight down one side of the smocking spread pleats evenly and open to the width of the pattern piece.


Pin down the other side of the smocking. Keep the top edge in line with the gathering thread. I usually pull that thread to the front at this point. Steam and spray the smocking. I use steam and a spray bottle of water. You can use spray starch, but I think it just makes your dress sticky. Allow to dry, overnight if necessary.

Next line up the skirt pattern piece with your smocked piece and mark the armhole edge with a washable marker or pencil. Pull the gathering thread to a bit more than 1/4 inch inside the armhole marking. The pin in the picture marks the poin to which I have pulled my gathering thread. Tie ONE side of the gathering thread in a big knot and trim off the remainder.


This is as far as I want to go today. I will continue as I construct this Mary De.

However, I do want to say that there is an alternative to this method. If you are making larger than a sized four, and your fabric is only 45 inches wide, you may not be able to have the smocking continue under the arm. (If your fabric is 45" and you want your smocking to continue under the arm, you can add two side panels before pleating.) But if the smocking is not going to go all the way to the side seam, cut out and pleat the skirt as above. Then pull the pleated fabric out flat and mark the armhole curves at this point. Pull the gathering threads out, back to 1/4" inside this line, and continue to pull them back to the same pleat down the length of the rows. Adjust the pleats to the front yoke piece, rather than the lining, and tie them off. Again, DO NOT TIE OFF THE GATHERING THREAD. Smock and then steam to the width of the front yoke piece, with the flat armhole area off to each side. Frankly I really like this dress smocked all the way to the side seam, so it is worth it to me to add the side panels. And there are so many fabrics that are 54 or 60 inches wide that this is seldom a problem. There is also a technique for doing this dress with a smocked insert, rather than the smocked skirt, but I would advise making the smocked skirt one or two times before attempting the insert.

The fabric I am using for my Mary De  is a brushed twill. Adelaide loves it because it is soft, us grown up types like it because it is warm. You will find it listed under twills, then individual fabrics will be listed as brushed twill. 

More later this week. Happy sewing!

Monday, October 3, 2011

Mary De AGAIN!!

     I have made literally dozens of Mary De jumpers, a Children's Corner pattern. It is a jumper/sundress and blouse pattern that is well suited to the extreme temperatures of New England. Some of you may remember that I made one for Adelaide last Thanksgiving. It was a sweet floral print in a brushed twill. Miss Adelaide loved it because it was so full and the fabric so soft. There has been a daily battle with Mama and Papa because the "Princess Dress" is the only thing she wants to wear. Here she is at The Museum of Fine Arts last January. (Yes that is Vivi in the background in a smocked corduroy jumper.)                                            

   I recently brought the dress home to launder (sidewalk chalk mixed with water all over the smocking). After a few repairs, (lots of going down slides, bike riding etc.) I decided the girl really deserves a new Mary De. It is all smocked, but I need to interrupt the construction to help a friend with a project. More on Mary De in a later post, including some tips on constructing this sweet jumper.
  

               And yes Vivi loved her Monkey dress! Getting a dress on this child is usually a battle which includes tears, pouting, wriggling out of arm's reach, and then pulling on the dress until she gets distracted by something. THIS dress she loved. I also made her a Curious George quilt.....A HUGE hit!
    

   So it is FALL! I don't know about you but I am crazy about Autumn. We are fortunate to live in New England; there is no place more beautiful at this time of year. Besides the urge to bake apple pie, make hearty soups, and get cozy in front of the fire, this is the time to get serious about our needle arts. Vacations are over, kids are back in school, the days are shorter, and there is no more yard work to do!
So, come on, get going! Let me know what you are working on! I will post again when I can get back to Mary De. Also working on a beautiful sweater, and a pumpkin hat for my new grand baby, who is very reluctant to make an appearance! And for Heaven's sake, pick some apples!!!